
Understanding Infrared Photography: Beyond the Visible Spectrum
Infrared photography is a captivating art form that unveils a world unseen by the human eye. As a professional specializing in surreal, dreamlike landscapes, I've spent years mastering techniques that transform ordinary scenes into extraordinary visions. This guide is designed to help you explore the technical aspects of infrared photography and unlock its creative potential.
What is Infrared Photography?
Infrared photography captures light wavelengths beyond the visible spectrum, ranging between 700 and 1200 nanometers. This technique reveals an alternate reality: foliage glows white, skies turn dramatically dark, and familiar landscapes become surreal dreamscapes.
Whether you're looking to create fine art, document nature, or experiment with architectural studies, infrared photography offers endless possibilities for creativity.
Essential Equipment
1. Camera Conversion
To shoot infrared, your camera must be modified or paired with an appropriate filter.
Full Spectrum Conversion: Offers the most flexibility, capturing all wavelengths.
IR Chrome Conversion: Produces vibrant, false-color effects reminiscent of vintage film.
Standard IR Filter: Ideal for classic black-and-white infrared photography.
Tip: Choose a conversion type based on your artistic vision. Full-spectrum cameras are versatile but require external filters for specific effects.
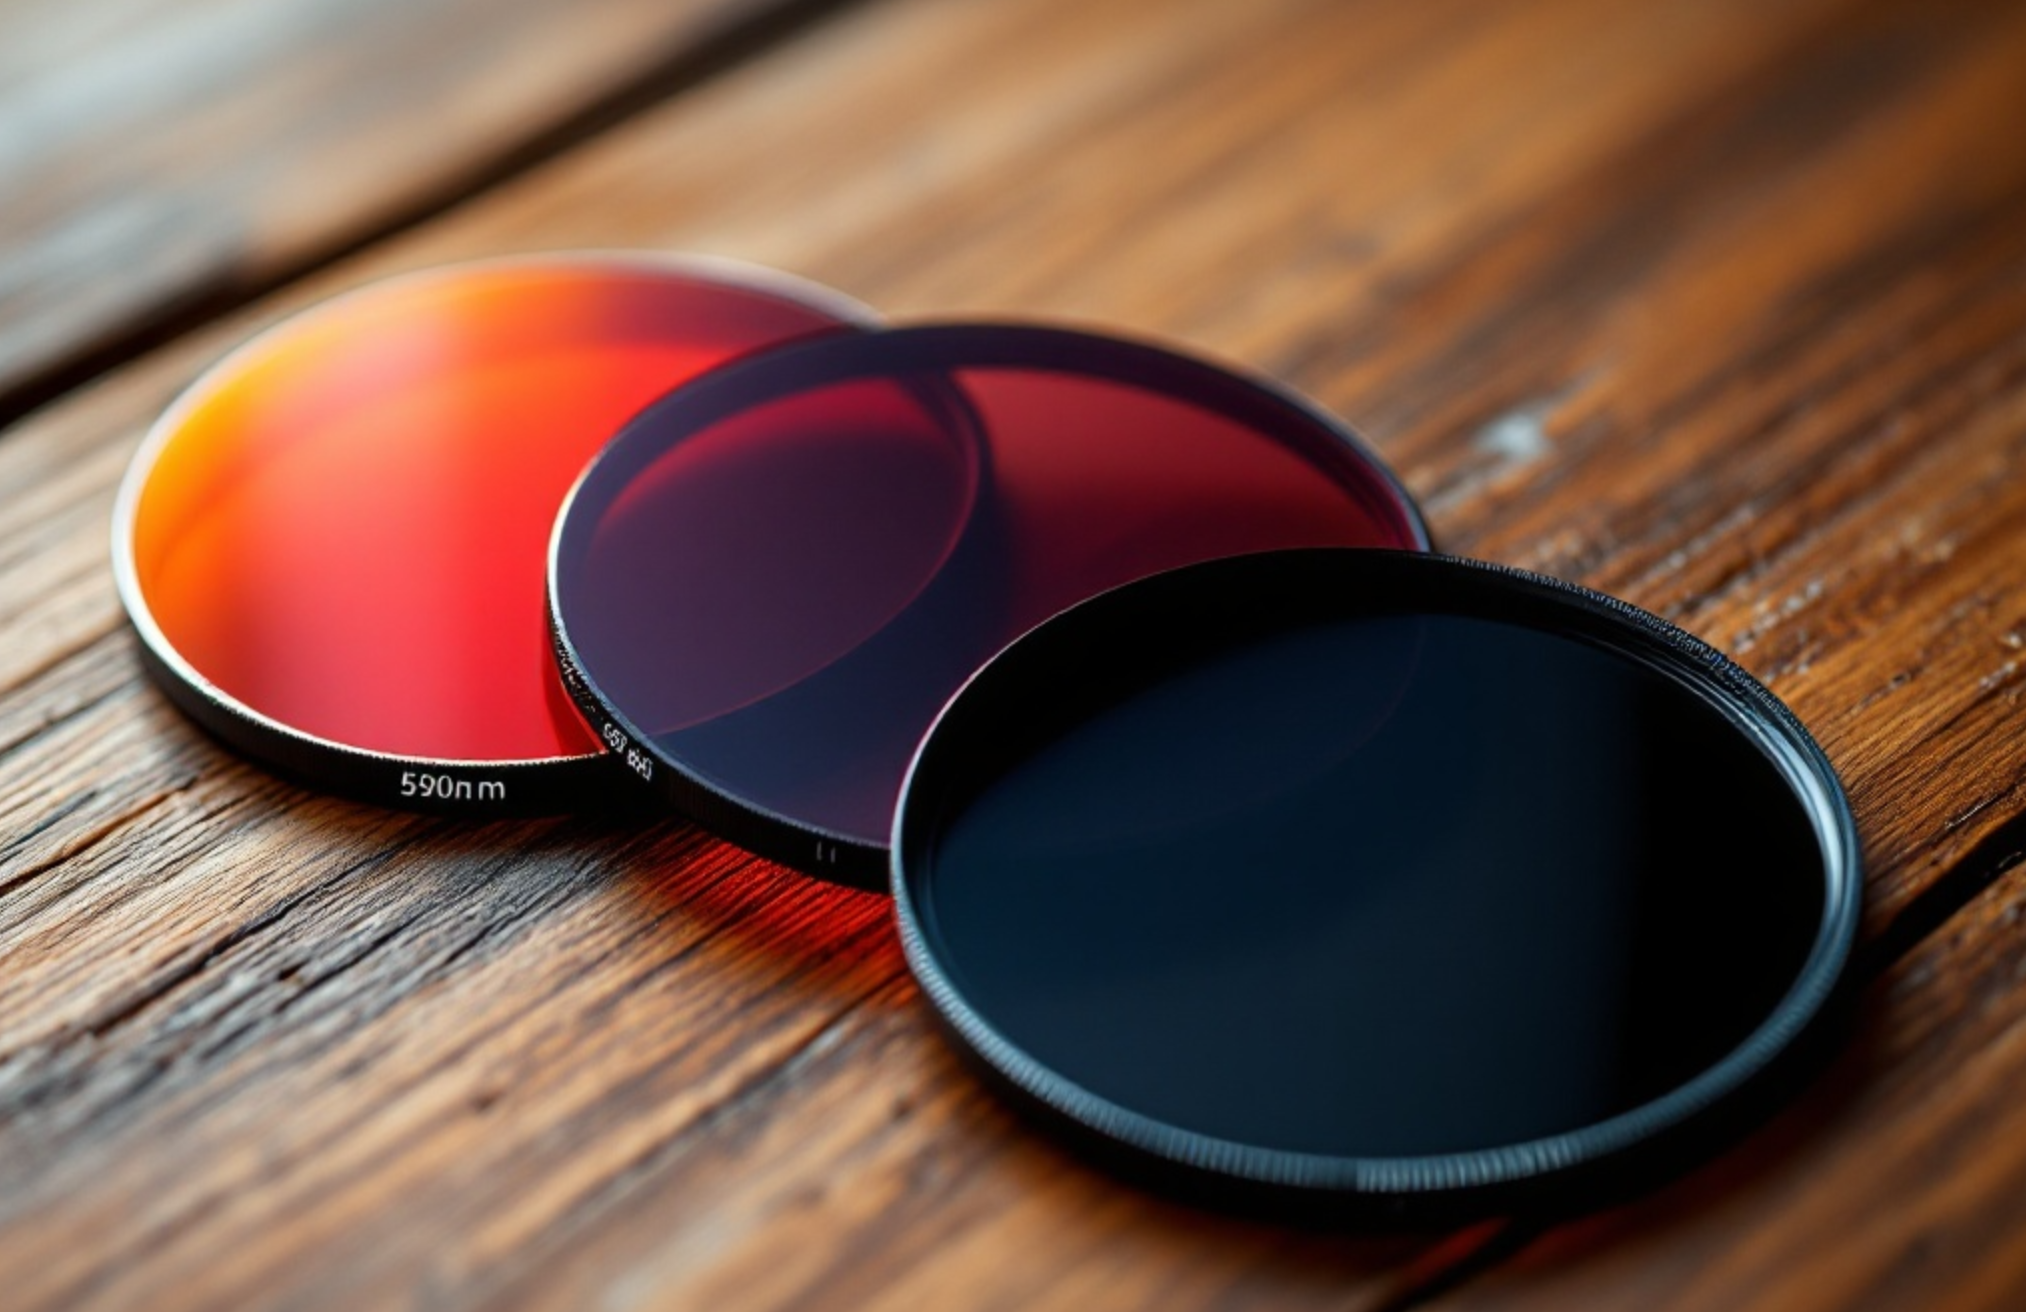
2. Filters and Wavelengths
Infrared filters control how much infrared light enters your camera. Each filter creates a unique effect:
590nm: Vibrant, colorful tones with glowing foliage.
665nm: A balance between color and monochrome.
720nm: Produces classic white foliage effects.
850nm: Delivers pure black-and-white infrared imagery.
Tip: Start with 720nm for its versatility and iconic infrared look, then experiment with others as your skills develop.
Post-Processing Techniques
The magic of infrared doesn't stop at capturing the image. Post-processing is where you truly bring your vision to life.
1. Raw Processing in Lightroom
White Balance: Adjust between 2000K-4500K for optimal results.
Contrast: Boost contrast to enhance the dramatic infrared effect.
Highlights: Manage bright areas to preserve detail in glowing foliage.
Clarity: Use sparingly to emphasize textures in landscapes.
Extra Tip: Use Lightroom's graduated filters to enhance the sky's drama while maintaining balanced exposure across the scene.
2. Advanced Photoshop Techniques
Channel Swapping: Swap red and blue channels to create striking color variations.
Selective Color Adjustments: Fine-tune specific tones for added vibrancy.
Dodging and Burning: Add depth by lightening highlights and darkening shadows.
Extra Tip: Save your post-processing steps as actions in Photoshop to streamline future edits.

Common Challenges and Solutions
Hot Spots
Cause: Internal lens reflections.
Solution: Use IR-compatible lenses and avoid small apertures.
Tip: Research online lists of lenses tested for infrared compatibility. Check out Kolari Visions Hot Spot Database.
2. Focus Issues
Challenge: Infrared light focuses differently from visible light.
Solution: Use Live View or mark infrared focus points on manual lenses.
3. Exposure
Infrared often requires longer exposures. Use a tripod for stability and bracket your shots to ensure optimal results.
Extra Tip: Always review the histogram to avoid clipping highlights or shadows.
Best Practices for Shooting
1. Timing and Weather
While bright, sunny days are traditionally recommended for infrared photography, they are not the only option. Dramatic cloud formations can create striking infrared effects, adding depth and mood to your compositions.
Sunny Days: Ideal for producing high-contrast infrared images with glowing foliage and dark skies.
Cloudy Skies: Offer dynamic textures and an atmospheric quality that can elevate your work beyond the conventional.
Extra Tip: Infrared photography thrives on personal taste and creativity. Don't hesitate to experiment with different weather conditions to discover what resonates with your artistic vision. Some of the most powerful infrared images come from thinking outside the box, which is why shooting infrared is such a rewarding experience.

Ethereal Blue Amidst Monochrome Forest
2. Subject Selection
Foliage: Trees, plants, and grass glow in infrared light.
Architecture: Buildings provide strong structural elements.
Water Features: Infrared reflects beautifully off water.
Skies: Dramatic cloud formations enhance the composition.
3. Composition Tips
Use leading lines to guide the viewer's eye.
Combine glowing foliage with textured skies for dynamic contrast.
Look for symmetry and geometric shapes to add balance.
Extra Tip: Experiment with unconventional angles to create unique perspectives.
Advanced Techniques
1. Multiple Wavelength Photography
Blend images taken with different filters (e.g., 590nm and 720nm) to create layered effects.
2. Combining Infraed and Visible Light
Overlay infrared and visible-light images to produce artistic hybrids that defy conventional styles.
Creative Applications
Fine art photography
Nature and wildlife projects
Architectural studies
Experimental compositions
Equipment Maintenance and Quality Control
Camera Care: Regularly clean your sensor and filters.
Lens Testing: Ensure all lenses are compatible with infrared to avoid hot spots.
Backup Gear: Always carry spare batteries, memory cards, and filters.
The Future of Infrared Photography
Infrared photography is evolving with new technologies and creative applications. Stay informed about the latest developments in equipment, techniques, and trends to push the boundaries of your work.
Final Thoughts
Infrared photography is a transformative art form that allows you to see and capture the world in a completely new way. By mastering the techniques and embracing experimentation, you can create extraordinary images that resonate with both emotion and artistry.
Whether you're just starting or refining your skills, remember that practice and curiosity are key. Explore new locations, try different filters, and continually push your creative boundaries.